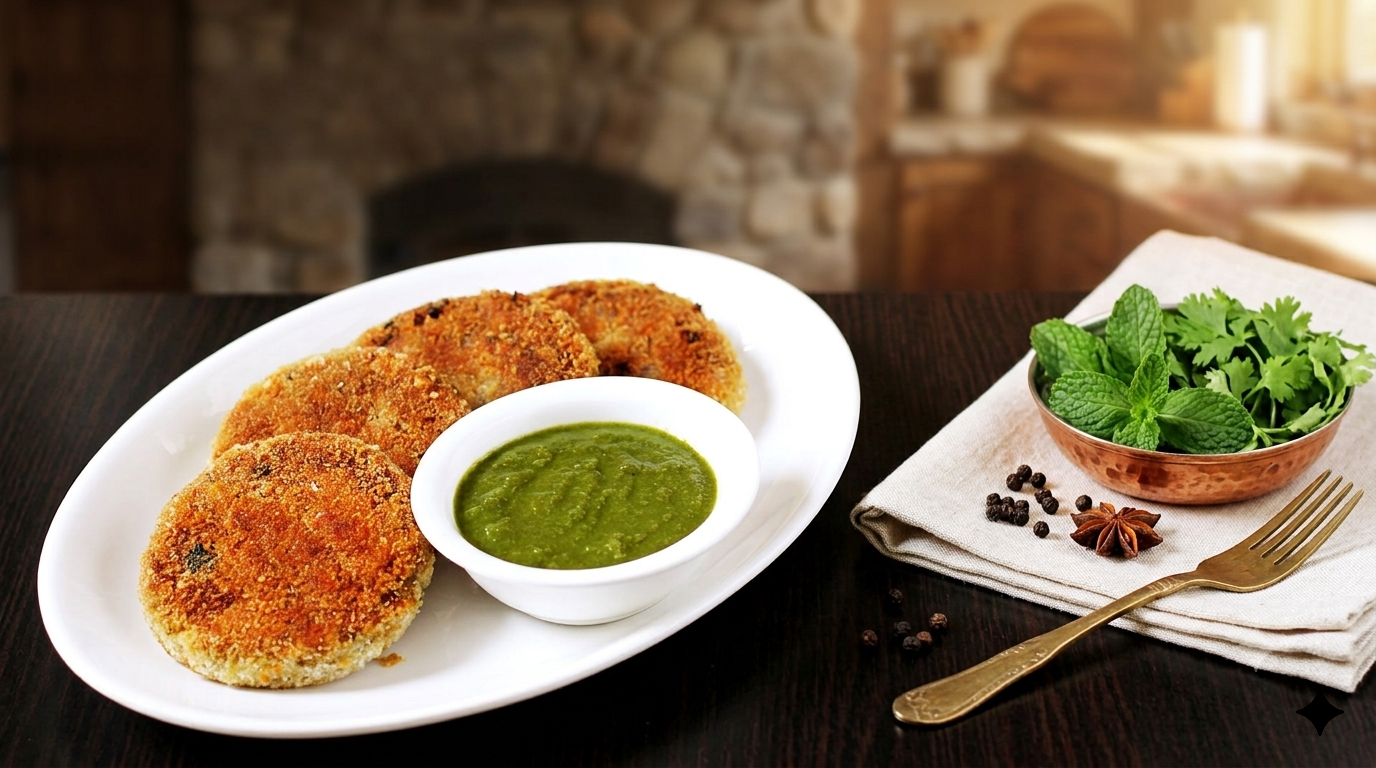
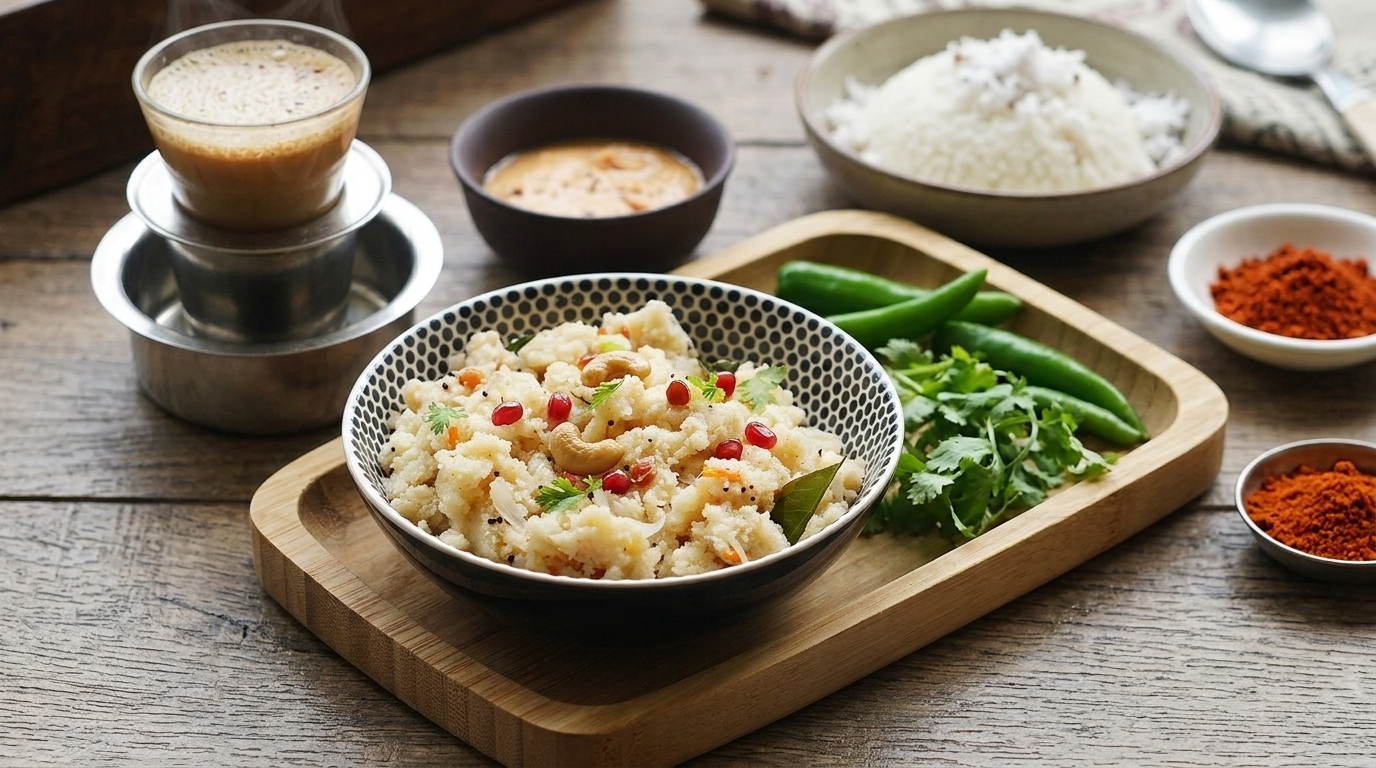
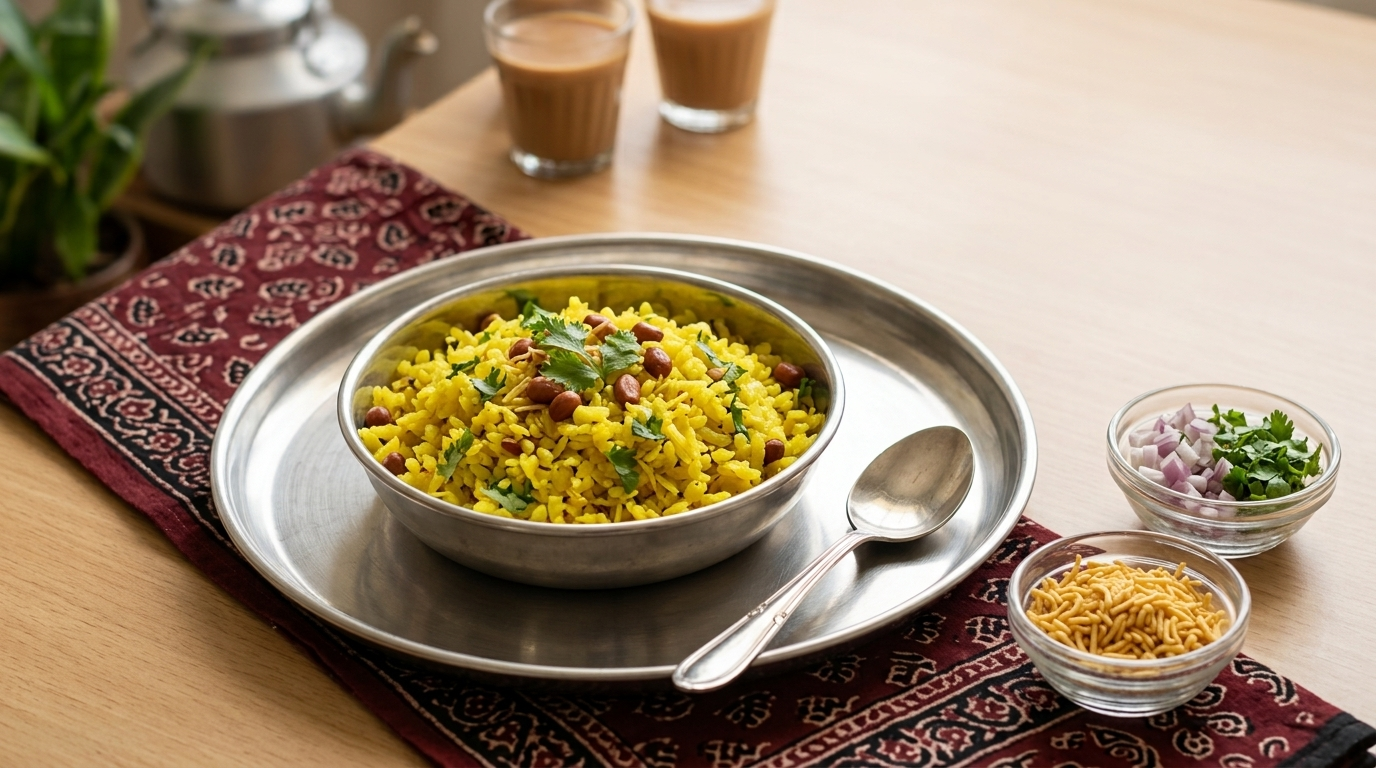
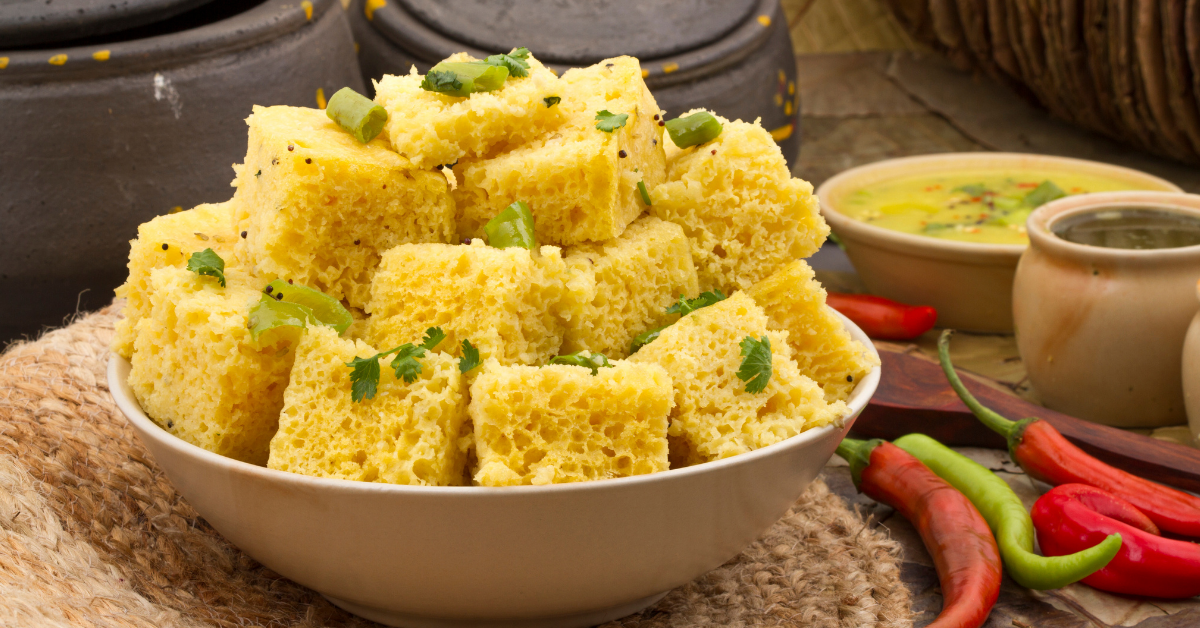
Dal Dhokli Recipe – A Delicious Gujarati Food 2025

Dal Dhokli Recipe

Dal Dhokli Recipe | Traditional Gujarati Dal Dhokli – GujaratiFoodRecipes.in

Introduction to Dal Dhokli Recipe

If you have ever explored Gujarati food recipes, you must have come across the soul-satisfying dal dhokli recipe – a one-pot meal that combines the wholesomeness of spiced lentil curry (dal) with soft, freshly kneaded wheat flour dumplings (dhokli). This Gujarati dal dhokli recipe is not only nutritious but also heartwarming, often enjoyed as a weekend family meal.

Known as a perfect blend of comfort and traditiondal dhokli has gained popularity across India and even internationally. Some people search for it as dal dhokla ingredients recipe, while others look up the traditional dal dhokli recipe passed on by grandmothers. Whatever name you call it by, this dish is an inseparable part of Gujarati cuisine.

In this guide, we’ll share a complete dal dhokli recipe with step-by-step instructions, tips, nutritional benefits, different variations (including Kathiyawadi dal dhokli recipe), and expert FAQs.

What is Dal Dhokli?

Dal dhokli is a traditional Gujarati comfort food made by simmering spiced whole wheat flour squares in a tangy, sweet, and flavorful toor dal (pigeon pea lentil) curry. Unlike simple dal, this dish becomes a wholesome one-pot meal when paired with soft dumplings.

Dal Dhokli Recipe

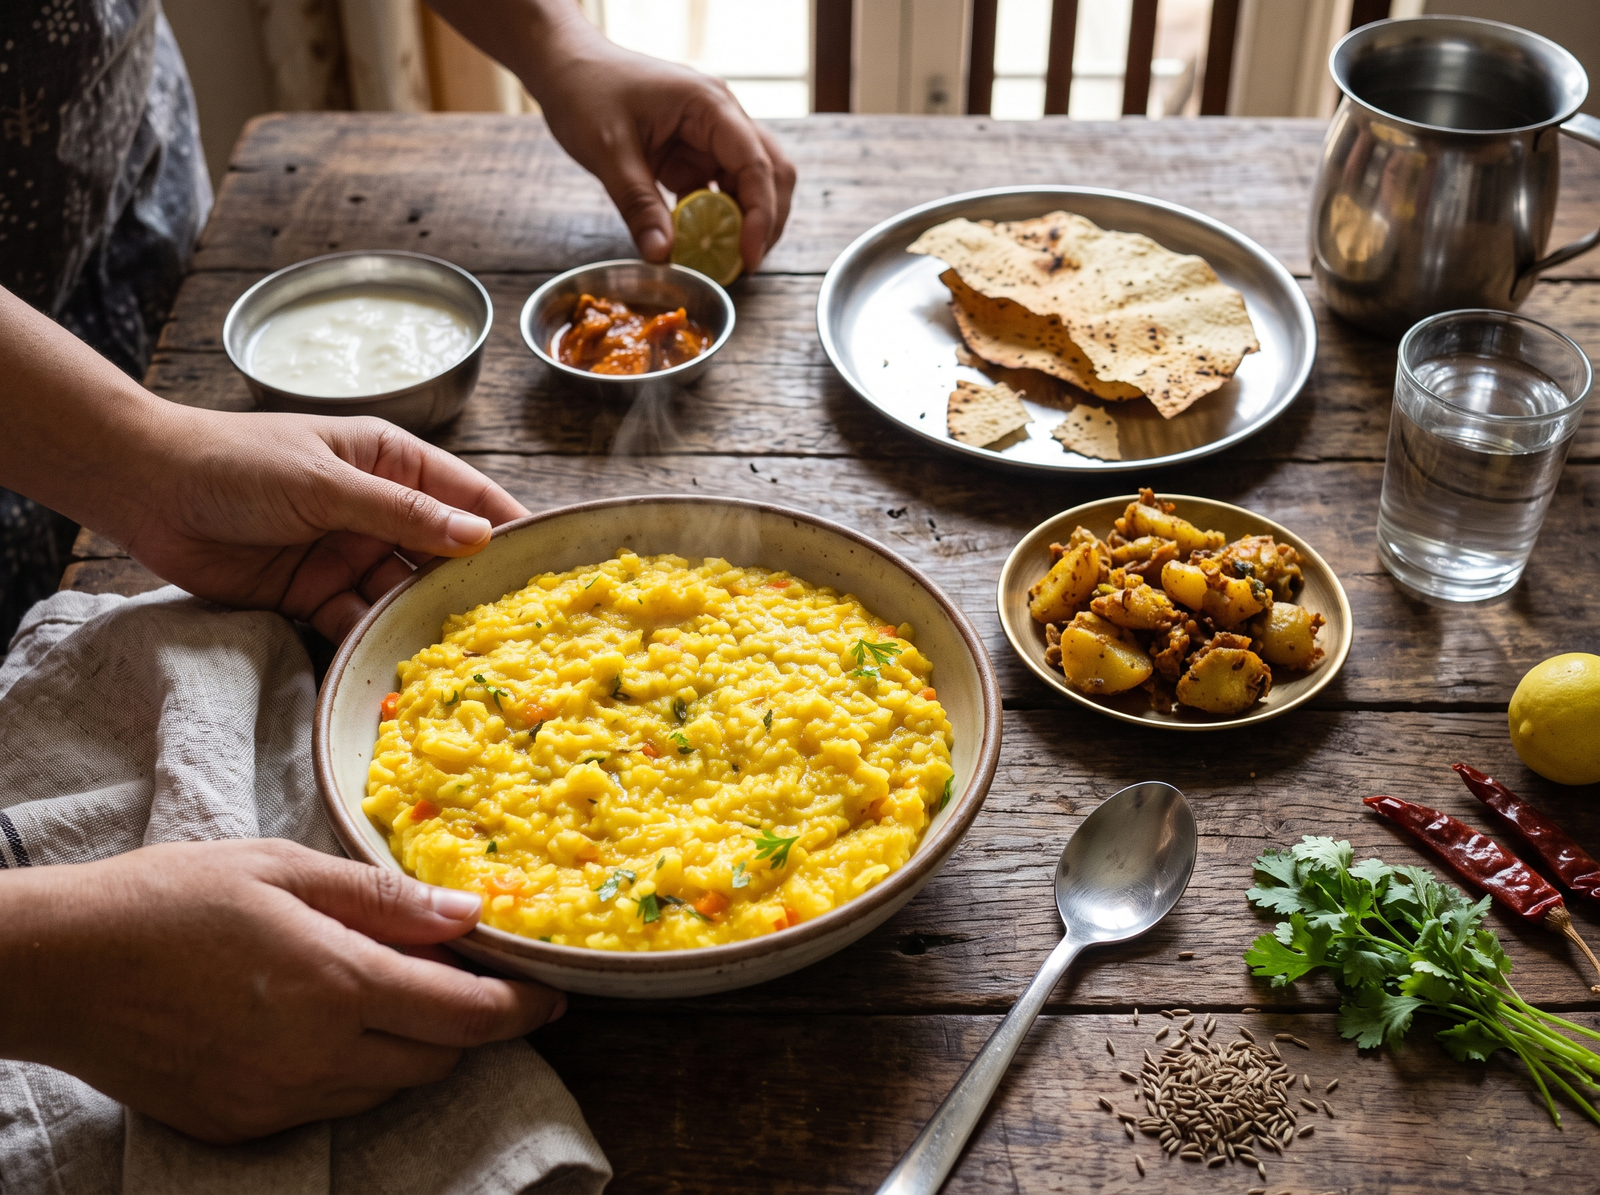
In Gujarat, it is often enjoyed on Sundays as a leisurely lunch, paired with buttermilk, pickle, and papad. Compared to regular rotis and dal, dal dhokli eliminates the need for multiple side dishes, making it convenient and satisfying.

History and Origin

The traditional dal dhokli recipe has its roots in Gujarati households. It was developed as a frugal yet hearty meal, where leftover dal was given new life by adding hand-rolled wheat dumplings. Over time, it evolved into a beloved recipe prepared with careful tempering, jaggery, kokum, peanuts, and spices.

In Kathiyawad (Saurashtra region of Gujarat), the Kathiyawadi dal dhokli recipe is prepared spicier with a hint of garlic and extra red chilies. On the other hand, some Rajasthani versions of dal dhokli, also called “Dal ki Fulkari,” lean towards a smokier and more tangy profile.

For the Dal (Lentil Curry)

  • 1 cup toor dal (pigeon pea lentils)
  • 2 tbsp peanuts
  • 2 tomatoes, finely chopped
  • 2-3 kokum pieces (or tamarind pulp)
  • ½ tsp turmeric powder
  • 1 tsp red chili powder
  • 1 tsp coriander-cumin powder
  • 1 tbsp jaggery (optional, for sweetness)
  • Salt to taste

For the Dhokli (Wheat Flour Dumplings)

  • 1 cup whole wheat flour
  • 2 tbsp besan (gram flour)
  • 1 tsp red chili powder
  • ½ tsp turmeric powder
  • ½ tsp ajwain (carom seeds)
  • 1 tbsp oil
  • Salt to taste
  • Water to knead

For the Tempering (Tadka)

  • 2 tbsp ghee or oil
  • 1 tsp mustard seeds
  • 1 tsp cumin seeds
  • A pinch of asafoetida (hing)
  • 2 dry red chilies
  • 10 curry leaves
  • 1-inch stick cinnamon (optional, for aroma)

Step-by-Step Dal Dhokli Recipe

Step 1 – Preparing the Dal

  1. Rinse the pigeon pea lentils (toor dal) thoroughly.
  2. Pressure cook the dal with turmeric and 2 cups of water for 3–4 whistles until soft and mushy.
  3. Mash the dal and keep aside.

Step 2 – Making the Dhokli

  1. Combine wheat flour, besan, spices, ajwain, and salt in a mixing bowl.
  2. Add oil and knead into a semi-soft dough using water.
  3. Roll out into thin chapati-like discs.
  4. Cut into diamond or square-shaped pieces (this becomes the dhokli).

Step 3 – Preparing the Tadka

  1. Heat ghee in a deep pan.
  2. Add mustard seeds, cumin seeds, asafoetida, curry leaves, and dry red chilies.
  3. Add chopped tomatoes and cook until mushy.
  4. Now add peanuts, jaggery, kokum, and ground spices.

Step 4 – Combining Everything

  1. Add cooked dal and adjust consistency with water. Bring to a boil.
  2. Gradually slide the prepared dhokli pieces into the boiling dal, stirring gently.
  3. Cover and simmer for 10–12 minutes until dhoklis are cooked.
  4. Add fresh coriander leaves and serve hot.

Variations of Dal Dhokli Recipe

Kathiyawadi Dal Dhokli Recipe

This variation uses garlic, extra green chilies, and lots of ground spices, making it much spicier than the mild Gujarati version. A dash of lemon juice and roasted peanuts add crunch and tang.

Sweet & Tangy Gujarati Dal Dhokli Recipe

The popular Gujarati dal dhokli recipe usually balances sweetness of jaggery with tang from kokum or tamarind, creating a lip-smacking contrast.

Healthy Dal Dhokli Recipe

For a health-conscious twist, use multigrain flour for dhokli, reduce jaggery, and add plenty of vegetables like spinach, drumstick, or bottle gourd.

Nutritional Benefits of Dal Dhokli

  • Rich in protein from toor dal and besan
  • Loaded with fiber due to whole wheat flour
  • Balanced meal – carbs, protein, and healthy fats in one dish
  • Comfort food that is also hearty and filling
  • Customizable for kids and seniors as it is soft and easy to digest

Expert Tips for Perfect Dal Dhokli

  • Always add dhokli to boiling dal, or else they may turn soggy.
  • Roll out the dhokli not too thick and not too thin.
  • For added flavor, squeeze a dash of lemon juice before serving.
  • Tastes best when enjoyed hot and fresh.

Serving Ideas

Dal Dhokli is often served hot, directly from the pan, paired with:

  • Buttermilk
  • Papad
  • Pickle
  • A spoon of ghee

It is a complete meal in itself and does not require chapati or rice.

Dal Dhokli Recipe by Tarla Dalal

Renowned chef Tarla Dalal made this dish globally popular through her cookbooks and recipes. Her Dal Dhokli recipe focuses on Gujarat’s authentic flavors, combining jaggery and kokum for that sweet-spicy-tangy balance. Many food enthusiasts still search for Dal Dhokli recipe by Tarla Dalal to replicate the classic taste at home.

If you are a fan of Gujarati cuisine, you may also like:

(For more Gujarati vegetarian delights, check do-follow food blogs like gujaratifoodrecipes.in)

FAQ: About Dal Dhokli Recipe

1. What is Dal Dhokli made of?

Dal Dhokli is made of toor dal curry flavored with spices, jaggery, kokum, and wheat flour dumplings.

2. Is Dal Dhokli same as Dal Dhokla?

No. Dal Dhokli is a lentil-based dish with dumplings, while Dal Dhokla is a steamed fermented snack. Some searches for “dal dhokla ingredients recipe” actually mean dal dhokli.

3. How to make traditional dal dhokli recipe at home?

The traditional dal dhokli recipe involves preparing spiced toor dal and simmering wheat flour dough shapes in it.

4. Which dal is used in Dal Dhokli?

Authentic Gujarati Dal Dhokli is prepared using toor dal (pigeon pea lentils).

5. Can we make dal dhokli without jaggery?

Yes. While jaggery adds a sweet flavor, it is optional. Some versions like Kathiyawadi dal dhokli recipe are spicier and skip the jaggery.

6. How is Gujarati dal dhokli recipe different from Rajasthani?

Gujarati dal dhokli is sweet and tangy, while Rajasthani dal dhokli is spicier and less sweet.

7. Is Dal Dhokli healthy?

Yes. It is a protein-rich, filling, and wholesome one-pot meal perfect for lunch or dinner.

8. Can I prepare dal dhokli in advance?

You can cook dal and dough separately, but combine dhokli with dal only before serving to prevent them from turning soggy.

9. How long does Dal Dhokli last?

Dal Dhokli tastes best fresh, but refrigerated dal (without dhokli) can last up to 2 days.

10. Which chef is famous for Dal Dhokli recipe?

Tarla Dalal is one of the most famous chefs who popularized Dal Dhokli across Indian households.

Leave a Comment

Methi Paneer Masala Recipe: A Flavorful Indian Delight 2025

Methi Paneer Masala Recipe

Introduction

Methi Paneer Masala Recipe: A Flavorful Indian Delight is an irresistible dish that combines the earthy flavors of fenugreek leaves (methi) with the creamy richness of paneer. Loved across India, this dish is a staple in many households and restaurant menus alike.

Its unique taste and nutritional benefits have made it popular in various regions, particularly in Gujarat and Punjab, each offering their own flavorful variations. This article will explore how to make methi paneer masala recipe, covering traditional and modern twists for every palate.

Methi Paneer Masala Recipe

What is Methi Paneer Masala Recipe?

Methi Paneer Masala Recipe is a curry prepared by cooking paneer cubes with fresh fenugreek leaves in a spicy, flavorful gravy. The key ingredients include methi (fenugreek leaves), paneer (Indian cottage cheese), tomatoes, onions, and a blend of spices that create a rich masala base.

Fenugreek leaves are known for their distinct aroma and numerous health benefits, including aiding digestion, controlling blood sugar, and improving heart health. Paneer adds a good source of protein and calcium, making this dish not only delicious but also nutritious.

Ingredients for Methi Paneer Masala Recipe

To prepare this delightful methi paneer masala recipe, the following ingredients are needed:

  • Fresh fenugreek leaves (methi) – 2 cups, washed and chopped
  • Paneer – 200 grams, cut into cubes
  • Onions – 2 medium, finely chopped
  • Tomatoes – 2 medium, pureed
  • Ginger-garlic paste – 1 tablespoon
  • Green chili – 1, finely chopped (optional)
  • Cumin seeds – 1 teaspoon
  • Turmeric powder – ½ teaspoon
  • Red chili powder – 1 teaspoon
  • Coriander powder – 1 tablespoon
  • Garam masala – 1 teaspoon
  • Fresh cream or malai (optional for creaminess) – 2 tablespoons
  • Oil or ghee – 2 tablespoons
  • Salt – to taste
  • Water – as required
  • Fresh coriander leaves – for garnishing

Tips for selecting fresh ingredients: Always choose fresh, tender methi leaves for the best flavor and avoid mature, bitter ones. Use fresh paneer or homemade paneer for enhanced texture and taste.

How to Make Methi Paneer Masala Recipe: Step-By-Step Guide

Preparation of Ingredients

  1. Wash the methi leaves thoroughly and chop finely.
  2. Cut paneer into medium-sized cubes. Optionally, lightly fry them for a slightly crispy texture.
  3. Puree the tomatoes for a smooth gravy base.

Cooking the Fenugreek and Paneer Masala

  1. Heat oil or ghee in a pan. Add cumin seeds and let them splutter.
  2. Add chopped onions and sauté until golden brown.
  3. Stir in the ginger-garlic paste and green chili. Cook for 1-2 minutes until raw smell disappears.
  4. Add turmeric, red chili powder, coriander powder, and salt. Mix well.

Making the Gravy

  1. Pour in the tomato puree and cook until the oil separates from the masala.
  2. Add the chopped methi leaves. Cook covered on medium heat until leaves wilt and soften.
  3. Add water to achieve desired gravy consistency. Let it simmer for 5-7 minutes.

Combining and Final Touches

  1. Gently add paneer cubes to the gravy. Stir carefully to coat them with the masala.
  2. Sprinkle garam masala and mix.
  3. For a rich, creamy texture, stir in fresh cream or malai.
  4. Cook for another 2-3 minutes on low flame. Garnish with chopped coriander leaves.
  5. Serve hot with roti, naan, or steamed rice.

Variations of Methi Paneer Recipe

Gujarati Style Methi Paneer Gujarati Recipe

Gujarati methi paneer masala recipe typically has a slightly sweeter and less spicy flavor. Jaggery or sugar may be added to balance the bitterness of methi. The gravy can be lighter and includes traditional Gujarati spices.

Punjabi Style Methi Paneer Masala Recipe

Punjabi style methi paneer masala recipe is richer, often using cream or butter generously. The spices are bold, and the masala is thick and creamy, often resembling restaurant-style methi paneer masala recipe.

Dhaba Style Methi Paneer Masala Recipe

Dhaba style methi paneer masala recipe is robust and spicy, served in roadside eateries with a smoky flavor. The gravy is thick with a strong presence of fenugreek and freshly crushed spices.

Methi Malai Paneer Recipe

This variant uses fresh cream (malai) to give a soft, rich, and mildly sweet flavor. It is perfect for those who prefer a luscious texture and subtle spice.

Tips for Making the Best Methi Paneer Masala Recipe

  • Use fresh methi leaves for the best aroma and flavor.
  • To reduce methi’s bitterness, blanch the leaves briefly in hot water before cooking.
  • Homemade paneer often yields better taste and texture.
  • Adjust spice levels to suit your taste for a mild or spicy methi paneer sabzi recipe.
  • For a healthy methi paneer recipe, use low-fat paneer and limit oil/ghee.
  • Incorporate fresh cream moderately if you prefer a quick methi paneer masala recipe that is lighter yet creamy.

Serving Suggestions

Methi paneer masala recipe pairs wonderfully with traditional Indian breads like chapati, naan, or paratha. It also complements steamed basmati rice or jeera rice beautifully. Leftovers can be refrigerated and reheated without losing flavor. For best results, store paneer separately and add fresh while reheating.

FAQ: About Methi Paneer Masala Recipe

1. What is the best way to reduce bitterness in methi leaves?

Blanching methi leaves in boiling water for 1-2 minutes and then rinsing with cold water helps reduce bitterness effectively.

2. Can I use frozen methi leaves for this recipe?

Yes, frozen methi leaves can be used, though fresh leaves provide better flavor and texture.

3. How do I make restaurant style methi paneer masala recipe at home?

Use fresh cream or malai and cook the masala longer for a rich, thick consistency. Sauté paneer cubes lightly before adding them to the gravy.

4. Is methi paneer masala recipe a healthy dish?

Yes, it’s nutritious due to fenugreek’s health benefits and protein in paneer. Opt for less oil and cream for a healthier version.

5. What can I serve with methi paneer masala recipe?

Methi paneer masala recipe pairs well with roti, naan, paratha, or plain rice to balance flavors.

6. How long can I store methi paneer masala recipe?

It can be stored in the refrigerator for up to 2-3 days in an airtight container.

7. What is the difference between methi paneer masala recipe and methi malai paneer?

Methi malai paneer includes cream (malai) for a richer and softer texture with milder spice compared to the spicier masala version.

8. Can I make methi paneer masala recipe without onions and tomatoes?

Yes, but this will change the flavor profile. You may need to use other spices or yogurt as a base for the gravy.

9. How to make quick methi paneer masala recipe without compromising taste?

Use ready-made ginger-garlic paste, fresh methi, and pre-cut paneer. Cook the masala on high flame but watch carefully to avoid burning.

10. What is the best methi paneer recipe for beginners?

Start with the easy methi paneer recipe mentioned here with simple steps and common spices. Adjust spices slowly.

Conclusion

The methi paneer masala recipe is a classic Indian dish cherished for its flavorful and healthy combination of fenugreek and paneer. Whether opting for a traditional Gujarati methi paneer Gujarati recipe or a rich Punjabi style methi paneer masala, this dish adapts well to diverse tastes and preferences. With simple ingredients and easy steps, this homemade methi paneer recipe is sure to impress at any meal. Try cooking this wholesome, aromatic, and creamy curry for a delightful experience of authentic Indian cuisine.

For more authentic Indian recipes and cooking tips, explore Indian Healthy Recipes and Veg Recipes of India for trusted kitchen inspiration.

Leave a Comment

Khaman Dhokla Recipe: A Gujarati Breakfast Delight 2025

Khaman Dhokla Recipe

Khaman Dhokla Recipe is a classic and beloved dish in the repertoire of simple Gujarati breakfast recipes. This soft, fluffy, and tangy steamed cake made primarily from gram flour (besan) is a staple in many households in Gujarat and loved throughout India.

Its light texture and mildly sweet-spicy flavor make it a perfect vegetarian breakfast option that pairs exceptionally well with a hot cup of tea. If you are looking to explore an authentic Gujarati breakfast recipe veg, this Khaman Dhokla recipe is an easy yet impressive dish to make at home.

What is Khaman Dhokla Recipe?

Khaman Dhokla Recipe is a savory steamed cake made from a fermented batter of chickpea flour, which is then spiced and tempered with mustard seeds, curry leaves, and green chilies. It is a signature item in the Indian Gujarati breakfast list and widely enjoyed as a quick snack or breakfast item.

The spongy texture combined with the tang from lemon juice or citric acid and a tempering that infuses aroma make this dish truly irresistible. Often garnished with fresh coriander and sometimes grated coconut, Khaman Dhokla Recipe is as visually appealing as it is delicious.

Khaman Dhokla Recipe

Ingredients for Khaman Dhokla Recipe

To make this iconic Gujarati breakfast delight, you need the following simple ingredients:

  • 1½ cups gram flour (besan)
  • 1 tablespoon semolina (sooji)
  • 1 tablespoon sugar
  • 1 teaspoon salt
  • 1½ teaspoons ginger-green chili paste
  • ¼ teaspoon turmeric powder
  • 1 tablespoon lemon juice or ¾ teaspoon citric acid
  • 1 teaspoon fruit salt (Eno)
  • 1½ cups water (adjust for batter consistency)
  • 2 tablespoons oil

For Tempering:

  • 1½ tablespoons oil
  • 1 teaspoon mustard seeds
  • 7-8 fresh curry leaves
  • 1-2 chopped green chilies
  • 1 teaspoon sugar
  • ½ cup water
  • A pinch of salt
  • Chopped coriander leaves for garnish
  • Optional: Grated fresh coconut for garnish

Step-by-Step Method to Make Khaman Dhokla

Preparing the Batter

  1. In a mixing bowl, combine gram flour, semolina, sugar, salt, turmeric powder, and ginger-green chili paste.
  2. Add water gradually and whisk to form a smooth, lump-free batter. The consistency should be similar to that of pancake batter — thick but pourable.
  3. Add lemon juice or citric acid and mix well.
  4. Just before steaming, sprinkle the fruit salt (Eno) on top of the batter and gently fold it in. The batter will become frothy and airy, which is essential for making the dhokla spongy.

Steaming the Dhokla

  1. Grease a flat steaming tray or a thali with oil.
  2. Pour the batter evenly into the tray.
  3. Steam the batter in a steamer or pressure cooker (without the whistle) for about 15-20 minutes on medium heat.
  4. Check for doneness by inserting a toothpick; if it comes out clean, the dhokla is ready.
  5. Allow the dhokla to cool slightly before cutting it into squares or diamonds.

Preparing the Tempering (Tadka)

  1. Heat oil in a small pan.
  2. Add mustard seeds and let them crackle.
  3. Add curry leaves, chopped green chilies, and a pinch of salt.
  4. Pour in water with sugar and bring it to a boil.
  5. Pour this tempering evenly over the steamed dhokla.

Garnishing and Serving

  • Garnish with chopped coriander leaves and freshly grated coconut.
  • Serve immediately with green chutney or sweet tamarind chutney.

Enjoy Khaman Dhokla as part of a wholesome Gujarati breakfast with tea, a combination cherished in many Gujarati homes.

Health Benefits of Khaman Dhokla Recipe

This dish is not only delicious but also healthy. Gram flour is rich in protein and fiber, making Khaman Dhokla Recipe a nutritious breakfast or snack option. It is steamed, making it low in fat compared to fried snacks. The fermentation process improves digestibility and adds pro-biotic benefits, supporting gut health.

Tips for the Best Khaman Dhokla Recipe

  • Use fresh fruit salt (Eno) as it helps achieve the signature fluffy texture.
  • Keep the batter smooth and lump-free for even steaming.
  • Ensure the water in the steamer is boiling before placing the batter inside.
  • Do not over-steam the dhokla to avoid dryness.
  • Serve fresh for the best taste and texture; it can be stored but is best enjoyed within a few hours.

Gujarati cuisine offers a variety of vegetarian breakfast dishes that are easy to prepare and full of flavor:

  • Thepla: Spiced whole wheat flatbread with fenugreek leaves.
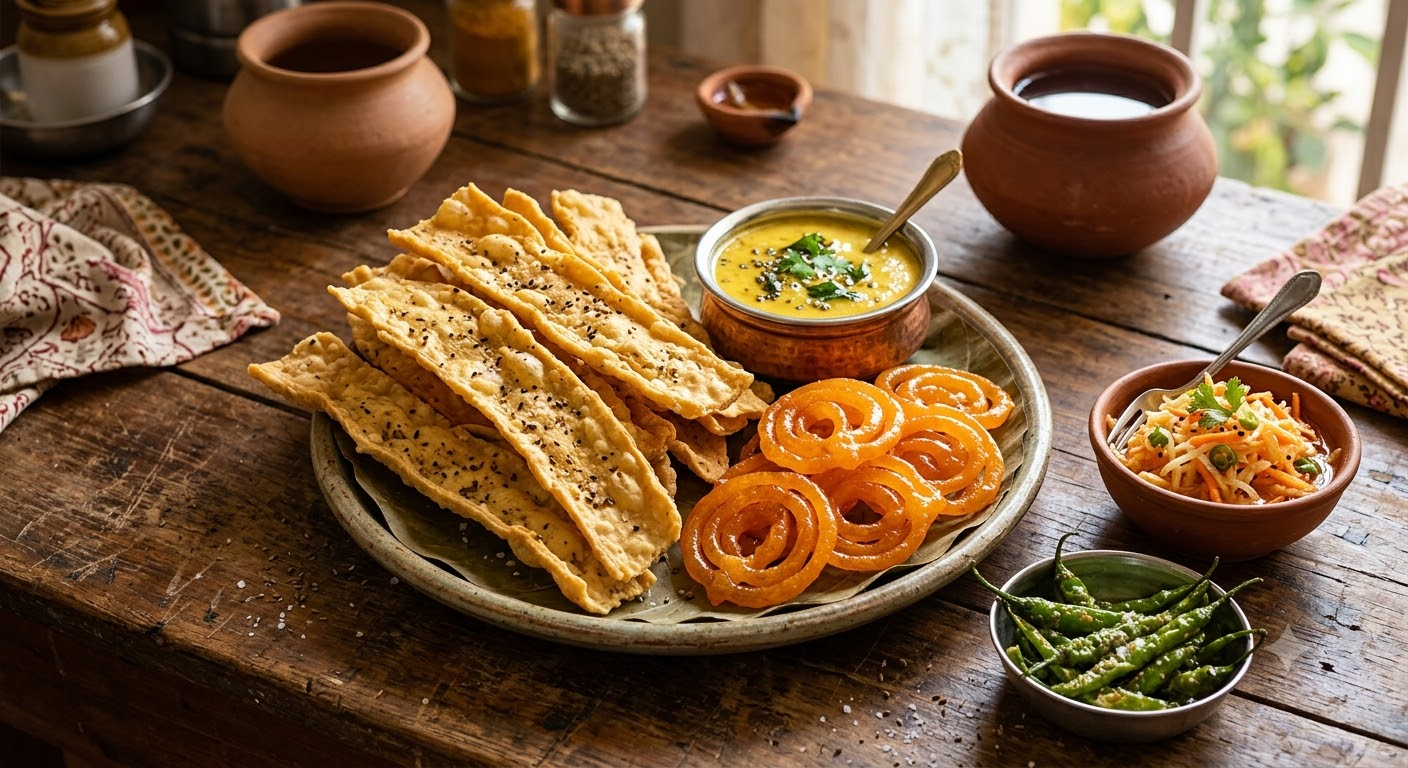
  • Fafda-Jalebi: Crunchy gram flour snacks paired with sweet jalebi.
  • Handvo: A savory vegetable lentil cake.
  • Patra: Rolled colocasia leaves cooked with a gram flour paste.
  • Khakra: Thin, crispy whole wheat crackers.

These dishes are often enjoyed with curd, pickles, and a hot cup of masala chai, forming a wholesome and energizing morning meal.

Serving Suggestions for Khaman Dhokla Recipe

Khaman pairs wonderfully with:

  • Green chutney (made of coriander and mint)
  • Sweet tamarind chutney
  • Fried green chilies for those who prefer extra heat
  • A glass of buttermilk (chaas)
  • Most notably, a cup of hot Gujarati breakfast with tea completes the authentic experience.

Khaman Dhokla Recipe Video

FAQs : Khaman Dhokla Recipe

1. What is the secret to making soft and spongy Khaman Dhokla Recipe?

The secret is using fresh fruit salt (Eno) and steaming the dhokla batter immediately after adding it. This technique creates air bubbles, resulting in a fluffy texture.

2. Can I make Khaman Dhokla Recipe without fermentation?

Yes, Khaman Dhokla Recipe batter does not require long fermentation. Adding Eno just before steaming reacts instantly for fluffiness.

3. Is Khaman Dhokla Recipe gluten-free?

Yes, Khaman Dhokla Recipe is naturally gluten-free as it is made with gram flour (besan), which comes from chickpeas.

4. How long can I store Khaman Dhokla Recipe?

You can store it in an airtight container for up to 1 day in the refrigerator. Reheat by steaming or microwaving before serving.

5. What chutneys go well with Khaman Dhokla Recipe?

Classic green coriander-mint chutney and sweet tamarind chutney complement the flavors of Khaman Dhokla perfectly.

6. Can I make Khaman Dhokla Recipe vegan?

Yes, it is naturally vegan as it contains no dairy or eggs.

7. What are some easy Gujarati breakfast recipes besides Khaman Dhokla Recipe?

Try Thepla, Fafda-Jalebi, Handvo, and Khakra as other popular and simple Gujarati breakfast recipes veg.

8. How to serve Khaman Dhokla Recipe with tea?

Serve warm dhokla with a side of green chutney and accompany it with a hot cup of masala chai to enjoy a traditional Gujarati breakfast experience.

9. Can I make Khaman Dhokla Recipe in the microwave?

Yes, there are instant microwave recipes that allow you to steam the dhokla quickly without a traditional steamer.

10. Is Khaman Dhokla Recipe a healthy breakfast option?

Absolutely, as it is steamed, rich in protein from gram flour, low in fat, and easy to digest, making it a wholesome vegetarian breakfast.

Khaman Dhokla Recipe stands as a timeless example of the simplicity and flavor packed into Gujarati breakfast recipes Indian vegetarian style. This dish fills the gap for anyone looking for wholesome, quick, and delicious breakfast ideas. Try this recipe today and bring home the authentic taste of Gujarat in your kitchen.

Leave a Comment

Handvo Recipe|How to make Perfect Gujarati recipe in 2025

Handvo Recipe in Gujarati

Handvo Recipe is a traditional Gujarati savory cake that combines fermented rice and lentil batter mixed with fresh vegetables and aromatic spices. This healthy and delicious dish can be served as a breakfast, snack, or light meal. With its crispy outer crust and soft, flavorful interior, Handvo Recipe is a beloved recipe in Gujarati households and is gaining popularity worldwide for its wholesome taste and nutritional benefits.

This comprehensive article covers multiple variations of Handvo including Handvo recipe with sujiinstant Handvo recipe, and recipes using Handvo flour to suit all cooking preferences. It also includes detailed ingredient lists, step-by-step instructions, tips for perfecting the dish, to provide you with everything needed for mastering this Gujarati classic.

Handvo Recipe in Gujarati

What is Handvo Recipe?

Handvo (હાંડવો) is a savory cake made from a fermented batter of rice, lentils, and sometimes semolina (suji) or ready-made handvo flour. The batter is enriched with grated vegetables like bottle gourd (lauki), carrot, and cabbage, adding moisture and nutrition. The cake is cooked on the stovetop or baked in the oven until golden and crisp, making it a satisfying and flavor-packed vegetarian dish. It’s typically tempered with mustard seeds, sesame seeds, curry leaves, and sometimes peanuts.

Handvo Recipe Ingredients

The following are common Handvo ingredients used across different recipes:

  • Rice – 1 cup (soaked)
  • Lentils: chana dal, toor dal, urad dal, moong dal (various combinations, usually soaked)
  • Semolina (Suji) – 3/4 to 1 cup (optional for suji handvo)
  • Handvo flour – pre-mixed flour available in Indian stores (optionally used)
  • Curd/Yogurt – 1/2 cup, for fermentation and tanginess
  • Water – as needed to make batter
  • Grated vegetables: bottle gourd (lauki), carrot, cabbage, etc.
  • Peanut oil or groundnut oil – for tempering and cooking
  • Mustard seeds (rai)
  • Sesame seeds (til)
  • Curry leaves (kadi patta)
  • Fenugreek seeds (methi)
  • Asafoetida (hing)
  • Spices: turmeric powder, red chili powder, coriander powder, ginger paste
  • Green chilies
  • Sugar or jaggery – to balance flavors
  • Salt
  • Eno fruit salt or baking soda – for quick fermentation or fluffiness

How to Make Handvo Recipe: Step-by-Step Gujarati Recipe

Preparation of Batter

  1. Soak and Grind: Soak rice and lentils (chana dal, toor dal, urad dal, moong dal) for 3-4 hours. Drain and grind with curd and water to make a thick but pourable batter similar to idli consistency.
  2. Fermentation: Cover the batter and let it ferment overnight or for 8-10 hours in a warm place for a tangy flavor. For an instant handvo, you can skip fermentation and use fruit salt (Eno) later.

Adding Vegetables and Spices

  1. Grate bottle gourd, carrot, and cabbage finely and add to the batter.
  2. Mix in salt, turmeric, red chili powder, ginger paste, green chilies, sugar or jaggery, and coriander leaves.
  3. Stir well to combine all ingredients uniformly.

Tempering

  1. Heat oil in a pan and add mustard seeds, sesame seeds, curry leaves, fenugreek seeds, and asafoetida till they splutter and become aromatic.
  2. Add this tempering to the batter and mix again.

Cooking Handvo

1) Stovetop Method
  • Heat a non-stick pan or cast-iron skillet with some oil.
  • Pour the batter evenly and cover the pan with a lid.
  • Cook on a low flame for about 10-12 minutes or until the bottom is golden.
  • Flip carefully and cook the other side till crisp and golden.
  • Remove and cool slightly before slicing.
2) Oven-Baked Method
  • Preheat the oven to 180°C (350°F).
  • Grease a baking pan and pour the batter evenly.
  • Sprinkle some sesame and mustard seeds on top for crunch.
  • Bake for 35–45 minutes until a toothpick inserted comes out clean.
  • Optionally broil for 1-2 minutes for a darker crust.
  • Cool, cut into slices, and serve.

Instant Handvo Recipe

For a quick version, use suji (semolina) instead of rice and lentils. Mix semolina with curd, water, grated vegetables, and spices. Let it rest for 10-15 minutes to soak the semolina. Just before cooking, add fruit salt (Eno) to the batter to make it fluffy. Cook on the stovetop or bake as described above. This method cuts down preparation time significantly and still delivers delicious results.

Tips for Perfect Handvo Recipe

  • Use fresh and finely grated vegetables to ensure even cooking.
  • For a richer flavor, add a handful of roasted peanuts or sesame seeds inside the batter.
  • Allow proper fermentation for better taste and texture; otherwise, use fruit salt appropriately.
  • Maintain low to medium heat during cooking to allow thorough cooking without burning.
  • Serve Handvo fresh to enjoy the crispy exterior and soft inside.
  • Pair with green chutney or tomato ketchup for enhanced flavor.

Nutritional Benefits of Handvo Recipe

Handvo is rich in proteins and fiber due to the inclusion of lentils and vegetables. The fermented batter promotes gut health by aiding digestion. The dish is naturally vegetarian and can be made vegan by avoiding dairy curd substitutes.

Serving Suggestions

  • Enjoy Handvo warm with green coriander chutney, garlic chutney, or sweet tamarind chutney.
  • It pairs wonderfully with masala chai (spiced tea) for breakfast or tea-time snack.
  • Serve alongside other Gujarati staples like thepla, kadhi, or a vegetable curry for a complete meal.

Frequently Asked Questions About Handvo Recipe:

1: What is the difference between Handvo recipe with suji and Handvo recipe with handvo flour?
A: Suji Handvo is made using semolina (suji) combined with curd and vegetables, making it quicker to prepare. Handvo flour is a ready-mix blend of rice, lentils, and spices sold in stores, which simplifies the process further. Both result in delicious Handvo but vary in preparation time.

2: How can I make an instant Handvo recipe without overnight fermentation?
A: Use semolina as the base and add fruit salt (Eno) right before cooking to make the batter fluffy without fermentation. Vegetables and spices are added for flavor.

3: Can Handvo recipe be baked instead of cooked on the stovetop?
A: Yes, baking Handvo yields a crispy crust and evenly cooked interior. Bake at 180°C (350°F) for 35-45 minutes.

4: What vegetables are traditionally used in Handvo?
A: Bottle gourd (lauki), carrot, cabbage, and sometimes spinach or fenugreek leaves are commonly added for moisture and nutrition.

5: Is Handvo gluten-free?
A: Traditional Handvo made from rice and lentils is gluten-free. If using suji (semolina), it contains gluten, so choose accordingly.

6: How do I store leftover Handvo?
A: Keep Handvo refrigerated in an airtight container for up to 2 days. Reheat in a pan or oven to restore crispness.

7: Can I make Handvo vegan?
A: Yes, replace curd with vegan yogurt or water and use oil or vegan butter for cooking.

8: What causes Handvo to become dense?
A: Insufficient fermentation, too thick a batter, or lack of fruit salt can cause density. Ensure proper fermentation or leavening for fluffiness.

9: What is the serving size of Handvo?
A: A typical recipe serves 4-6 people depending on portion size.

10: Where can I buy Handvo flour?
A: Handvo flour is available in most Indian grocery stores or online specialty shops.

Leave a Comment

Sev Tameta nu Shaak: A Traditional Gujarati Delight 2025

Sev Tameta nu Shaak

Sev Tameta nu Shaak is a beloved Gujarati recipe that perfectly blends tangy tomatoes with crispy sev to create a flavorful and satisfying vegetarian dish. This authentic Gujarati curry offers an explosion of tastes and textures, representing the essence of Gujarati home cooking.

In this comprehensive article, we will explore the Sev Tameta nu Shaak ingredients, its traditional preparation, variations, and serving suggestions. Whether you are a novice cook or a seasoned chef, this dish promises to delight your taste buds. Let’s dive into this classic recipe, also known as Sev Tameta nu Shaak in Gujarati recipe style.

What is Sev Tameta nu Shaak?

“Sev Tameta nu Shaak” literally means “Tomato curry with sev” in Gujarati, where “sev” refers to crispy, fried gram flour noodles sprinkled generously on top, adding crunch and flavor. The “tameta” (tomatoes) form the base of the curry, providing tanginess combined with a hint of sweetness. This dish typically balances savory, sweet, and spicy notes, a hallmark of Gujarati cuisine.

Sev Tameta nu Shaak

Sev Tameta nu Shaak Ingredients

The beauty of Sev Tameta nu Shaak lies in its simplicity with fresh, everyday ingredients that come together to create a soulful meal. Below is a typical list of ingredients used in this recipe:

  • Tomatoes (2-3 large, ripe and juicy) – the star ingredient, providing tang and body to the curry
  • Besan sev (1 cup) – slightly thick sev preferred to maintain crispness
  • Peanut oil (2-3 tablespoons) – adds a subtle nutty flavor traditional to Gujarati cooking
  • Mustard seeds (½ teaspoon)
  • Cumin seeds (Jeera) (½ teaspoon)
  • Fenugreek seeds (Methi) (¼ teaspoon)
  • Asafoetida (Hing) (a pinch) – enhances flavor and aids digestion
  • Red chili powder (1 teaspoon) – for heat
  • Turmeric powder (¼ teaspoon) – for color and earthiness
  • Coriander-cumin powder (Dhaniya Jeera) (1 teaspoon) – signature spice mix for aroma
  • Jaggery or sugar (1 teaspoon) – adds a delicate sweetness
  • Salt (to taste)
  • Water (1 cup or as required) – to make the curry
  • Fresh coriander leaves (chopped, for garnish)

These ingredients combine to create a quick, balanced curry that highlights the flavors of Gujarati cuisine. You can adjust spices and sev quantity to taste.

How to Make Sev Tameta nu Shaak: Step-by-Step Gujarati Recipe

Preparation

  1. Wash and chop the tomatoes finely.
  2. Keep all spices and ingredients ready for easy cooking.

Cooking Instructions

Step 1: Tempering the Spices

  • Heat peanut oil in a pan on medium flame.
  • Add mustard seeds and cumin seeds. Let them splutter.
  • Add fenugreek seeds and a pinch of asafoetida.
  • Allow the mixture to get aromatic.

Step 2: Cooking the Tomatoes

  • Add the chopped tomatoes to the pan.
  • Sauté on medium heat until the tomatoes soften and begin releasing oil.
  • Add red chili powder, turmeric, coriander-cumin powder, salt, and jaggery or sugar.
  • Mix well and cook for 2-3 minutes.

Step 3: Making the Curry

  • Add water to adjust consistency and bring the curry to a boil.
  • Simmer for 8-10 minutes or until the tomatoes and spices meld perfectly.
  • Turn off the stove and sprinkle fresh coriander.

Step 4: Adding the Sev and Serving

  • Just before serving, generously top the curry with the besan sev.
  • Serve immediately to keep sev crispy.
  • Garnish further with coriander leaves if desired.

Tips for the Best Sev Tameta nu Shaak

  • Use slightly thicker sev to prevent it from becoming soggy quickly.
  • Add sev just before serving for the best crunch.
  • Balance the sweetness with jaggery or sugar to counteract tomato acidity.
  • Fenugreek seeds add a unique bittersweet note, so don’t skip them.
  • For a richer dhaba-style version, some recipes include garlic and onions.
  • Pair with Bajra rotla, soft chapatis, or Thepla for a complete meal.

Nutritional Benefits

Sev Tameta nu Shaak is a wholesome dish that is naturally vegetarian and can be made vegan by using appropriate sev. Tomatoes provide antioxidants such as lycopene, vitamins, and minerals. Besan sev adds protein and texture, while the spices bring digestive benefits. This makes the dish not only tasty but nourishing.

Serving Suggestions

  • Traditional Gujarati roti or bajra rotla
  • Steamed rice or jeera rice
  • Indian flatbreads like thepla or paratha
  • Accompanied by pickles and yogurt for a perfect meal balance

FAQs: About Sev Tameta nu Shaak Recipe

1: What kind of sev is best for Sev Tameta nu Shaak?
A: Use slightly thick besan sev or gathiya so it stays crispy in the curry.

2: Can I make Sev Tameta nu Shaak without oil?
A: Oil helps in tempering spices and flavor extraction; for a low-oil version, reduce oil but don’t omit completely.

3: Is Sev Tameta nu Shaak gluten-free?
A: Traditional sev is made of gram flour (besan), which is gluten-free, but check packaged sev for additives.

4: How to keep the sev crispy?
A: Add sev just before serving, and do not mix too early to avoid sogginess.

5: Can I prepare Sev Tameta nu Shaak in advance?
A: Prepare the curry ahead but add sev fresh before serving.

6: What can I use as a substitute for sev?
A: You can use thin fried gram flour sticks or slightly thick gathiya as an alternative.

7: Is Sev Tameta nu Shaak spicy?
A: It has a mild spiciness that can be adjusted by varying red chili powder or adding green chilies.

8: Is this dish Jain-friendly?
A: Yes, this recipe can be made Jain-friendly by avoiding onions, garlic, and root vegetables.

9: Can I use canned tomatoes for this recipe?
A: Fresh tomatoes are preferred for flavor, but canned tomatoes can be used in a pinch.

10: What is the origin of Sev Tameta nu Shaak?
A: It is a traditional vegetarian dish from Gujarat, commonly prepared in homes and restaurants as a staple.

Conclusion:

Sev Tameta nu Shaak is a timeless Gujarati recipe that marries the tanginess of fresh tomatoes with the crunchy delight of sev for a rich culinary experience. Whether you seek to explore authentic regional Indian cuisine or want a comforting everyday meal, this dish is a perfect choice. Its simple ingredients, vibrant flavors, and quick preparation make it an ideal recipe for all kinds of cooks.

Enhance your Gujarati recipe repertoire by mastering Sev Tameta nu Shaak, an unforgettable taste of Gujarat’s culinary heritage.

Leave a Comment

Farali Pattice Recipe: Authentic Gujarati Fasting Recipe 2025

Farali Pattice Recipe in Gujarati

If you’re searching for an authentic farali pattice recipe, your journey ends here! Farali pattice is a beloved Gujarati snack, especially popular during fasting periods such as Navratri, Mahashivratri, and Ekadashi. It’s a delicious combination of crispy potato covering and a sweet-spicy stuffing, making it the star of Indian vrat (fasting) cuisine.

In this in-depth guide, you’ll discover everything about farali pattice recipe ingredients, step-by-step cooking methods, tips for making it healthier or unique, and even answers to frequently asked questions which is truly helpful. We’ll also cover variations and serving suggestions to make your farali pattice stand out.

What is Farali Pattice Recipe?

Farali pattice, also known as vrat wali aloo tikki or farali petis, is a stuffed potato patty designed for fast days in India. The word “farali” refers to special items consumed during Hindu religious fasts, while “pattice” signifies the dumpling-like structure made by stuffing and frying mashed potatoes.

  • Origin: Gujarat, India.
  • Category: Fasting snack (Upvas or Vrat recipe).
  • Texture: Crispy outside, soft and flavorful inside.
Farali Pattice Recipe

Farali Pattice Recipe Ingredients

This section covers all essential ingredients for authentic Gujarati as well as generic Indian farali pattice.

For the Potato Cover

  • 5-6 medium boiled potatoes
  • 3 tbsp arrowroot flour (or water chestnut flour/singhara flour/amaranth flour)
  • Rock salt (sendha namak) to taste
  • Oil for deep-frying (groundnut or sunflower for subtle taste)

For the Stuffing

  • ¼ cup grated fresh coconut
  • ¼ cup roasted and crushed peanuts
  • 2 tbsp lemon juice
  • 2 tbsp powdered sugar
  • 2 tsp chopped cashew nuts
  • 2 tsp raisins
  • 2 tbsp chopped coriander leaves
  • 2 tbsp green chili paste
  • 1/2 inch grated ginger (optional)
  • Rock salt (sendha namak) to taste

For Coating

  • 2 tbsp arrowroot flour or farali flour

For Farali Chutney (Optional)

  • ½ cup roasted peanuts
  • ¼ cup yogurt (curd)
  • 2 green chilies
  • 1 tsp cumin seeds
  • 1 tsp lemon juice
  • Rock salt (sendha namak) to taste

Farali Pattice Recipe in Gujarati : Step-by-Step Method

Preparing the Potato Cover

  1. Peel and mash boiled potatoes until smooth.
  2. Add arrowroot flour and rock salt to the mashed potatoes.
  3. Mix and knead into a soft, pliable dough. Use minimal water; the dough must be firm enough to shape.

Making the Sweet-Spicy Stuffing

  1. In a bowl, combine grated coconut, crushed peanuts, chopped cashews, raisins, coriander, green chili paste, ginger, powdered sugar, lemon juice, and rock salt.
  2. Mix well. The stuffing should have a balanced sweet and tangy flavor.

Shaping the Patties

  1. Grease your palms with a little oil.
  2. Take a small ball of potato dough and flatten it into a disc shape.
  3. Place a spoonful of stuffing in the center.
  4. Bring the edges together to encase the filling, pinch to seal, and gently shape into round or oval patties.
  5. Repeat with the remaining dough and stuffing.

Coating and Frying

  1. Roll each pattice gently in arrowroot flour for crispiness.
  2. Heat oil in a kadhai or deep pan to medium-high (about 170°C).
  3. Carefully slide patties into hot oil. Fry in batches, do not over-crowd.
  4. Fry till golden brown and crispy on all sides.
  5. Remove and drain on a kitchen towel to absorb excess oil.

Serving Suggestions

  • Serve hot with green farali chutney or sweetened curd.
  • Garnish with chopped coriander or desiccated coconut.

Farali Pattice Recipe Indian Variations

Sweet Potato Option

Replace half the potato with boiled sweet potato for a healthier twist and natural sweetness.

Oil-Free/Baked Version

Shape and coat the patties as per recipe; bake in a preheated oven at 200°C for 15-20 minutes, flipping midway, for a guilt-free version.

Nut-Free Variation

Skip peanuts and cashews for nut allergies; replace with additional coconut and dried fruits.

Surti Style

Gujarati “Surti petis” often includes sabudana (sago pearls) in the dough for added texture and flavor.

Tips for Perfect Farali Pattice Recipe

  • Always use starchy potatoes for the best binding.
  • Arrowroot or singhara flour is optimal for fasting days and ensures crispiness.
  • Seal the pattice properly to avoid stuffing leakage during frying.
  • Do not stir the patties immediately after dropping them in hot oil; let them set for a minute to avoid breaking.
  • For more tang, add a dash of amchur powder or more lemon juice.

Nutrition and Benefits

Farali pattice is rich in carbs and healthy fats due to the potatoes, nuts, and coconut. The use of fasting-friendly flours (arrowroot, singhara) makes them easier to digest and suitable for religious fasts. Baked and less-oil versions are lower in calories and ideal for weight-watchers.

Serving & Storage

  • Serve immediately for best taste and texture.
  • If storing, cool to room temperature and refrigerate in airtight containers for up to 2 days. Reheat by shallow frying, air frying, or baking.
  • Leftover farali pattice can be crumbled into salad bowls or added to fasting chaat recipes.

FAQs on Farali Pattice Recipe

1. What are the main farali pattice recipe ingredients?

Potatoes, arrowroot flour, coconut, peanuts, sugar, cashews, raisins, and fasting salt are the main ingredients.

2. Is farali pattice a Gujarati recipe?

Absolutely! Farali pattice recipe is a classic Gujarati fasting snack, popular throughout India during festival fasts.

3. Can farali pattice be baked?

Yes! You can make oil-free baked farali pattice recipe by baking at 200°C for 15-20 minutes, flipping midway.

4. What flour is fasting-friendly for farali pattice?

Arrowroot flour, water chestnut flour (singhara), or amaranth flour are commonly used for fasting recipes.

5. How is farali pattice recipe different from regular aloo tikki?

Farali pattice uses fasting-safe ingredients, a sweet-savory stuffing, and is gluten-free, unlike regular aloo tikki.

6. Can I make farali pattice recipe without nuts?

For nut allergies, skip peanuts and cashews; increase coconut and add more raisins or dried cranberries for taste.

7. Which oil is healthiest for frying farali pattice recipe?

Cold-pressed groundnut oil or sunflower oil is recommended for lighter taste and health benefits.

8. Can farali pattice recipe be frozen?

Yes, uncooked pattice can be frozen for up to two weeks. Thaw and fry directly without defrosting.

9. What chutney goes best with farali pattice recipe?

Green chutney (coriander-peanut), sweetened curd, or tangy tamarind chutney are perfect for serving.

10. Is farali pattice recipe Indian?

Yes, it is a traditional Indian fasting food, especially from Gujarat, but enjoyed all over the country during fasting seasons.

Conclusion: Farali Pattice Recipe

The farali pattice recipe offers an irresistible combination of taste, tradition, and health. Whether you follow the classic farali pattice Gujarati recipe or try the creative Indian variations, this snack will enrich your fasting menu. Experiment with stuffing and shapes—for every batch you’ll discover why farali pattice is an all-time favorite!

Leave a Comment

Authentic Dabeli Masala Recipe 2025

Dabeli Masala Recipe

Dabeli, also known as Kacchi Dabeli, is one of the most celebrated street foods of Gujarat, especially from the Kutch region. This spicy, tangy, and sweet snack has won the hearts of food lovers across India and beyond. The secret behind its irresistible taste lies in the Dabeli Masala Recipe a perfectly balanced spice blend that gives the dish its unique flavor and aroma.

In this comprehensive guide, we bring you the most authentic Dabeli Masala Recipe, with a detailed explanation of ingredients, preparation methods, and serving tips to recreate this street-style delicacy at home.

What is Dabeli Masala Recipe?

Dabeli Masala is a fragrant, roasted spice mix made with a combination of dried red chilies, coriander seeds, cumin, cinnamon, cloves, and other Indian spices. When ground together, these spices create a warm, aromatic blend that transforms boiled potatoes into the perfect stuffing for Dabeli.

Unlike generic masalas, Dabeli Masala Recipe has a signature balance – spicy, tangy, and slightly sweet – that captures the essence of Gujarati street food.

Dabeli Masala Recipe

Dabeli Masala Recipe Ingredients

Here’s the complete list of Dabeli Masala Recipe Ingredients to get the authentic flavor of Kutch:

  • Whole Spices:
    • 8–10 dried red chilies (preferably Byadgi for color and Kashmiri for mild heat)
    • 2 tablespoons coriander seeds
    • 1 tablespoon cumin seeds
    • 1-inch cinnamon stick
    • 4–5 cloves
    • 1 teaspoon black peppercorns
    • 1 teaspoon fennel seeds
  • Powdered Spices:
    • ½ teaspoon turmeric powder
    • 1 teaspoon amchur powder (dry mango powder)
    • ½ teaspoon black salt
    • Salt to taste
  • Other Ingredients:
    • 1 tablespoon oil for roasting spices
    • ½ teaspoon sugar (optional for a mild sweetness)

How to Make Dabeli Masala Recipe at Home

Follow this step-by-step Dabeli Masala Recipe for a rich, street-style flavor:

Step 1: Dry Roast the Whole Spices

Heat a heavy-bottomed pan on low flame. Add coriander seeds, cumin seeds, fennel seeds, cinnamon, cloves, and peppercorns. Dry roast for 2–3 minutes until aromatic.

Step 2: Roast the Red Chilies

Add dried red chilies to the pan and roast for another minute. Avoid burning them to retain color and flavor.

Step 3: Blend the Masala

Once roasted, allow the spices to cool. Transfer them to a grinder, add turmeric powder, amchur powder, black salt, and regular salt. Grind into a fine powder.

Step 4: Store for Freshness

Store the Dabeli Masala in an airtight container in a cool, dry place. For best results, use within 2–3 weeks.

How to Make the Kacchi Dabeli Filling

The masala alone isn’t enough; the Kacchi Dabeli recipe is incomplete without its delicious potato filling.

Ingredients for Potato Filling:

  • 3 medium-sized boiled potatoes (mashed)
  • 2–3 tablespoons Dabeli Masala Recipe
  • 2 tablespoons oil
  • 1 teaspoon tamarind chutney
  • Salt to taste

Method:

  1. Heat oil in a pan.
  2. Add the Dabeli Masala and sauté for a few seconds.
  3. Add mashed potatoes, salt, and tamarind chutney.
  4. Mix well until the potatoes are evenly coated.
  5. Garnish with pomegranate seeds and roasted peanuts for an authentic touch.

How to Assemble Kacchi Dabeli

  1. Slice ladi pav (soft buns) in half and lightly toast with butter.
  2. Spread tamarind chutney on one side and garlic chutney on the other.
  3. Place a generous amount of the Dabeli potato filling in between.
  4. Roll the stuffed pav edges in sev for crunch.
  5. Serve hot with extra chutney.

Tips for the Perfect Dabeli Masala Recipe

  • Always roast the spices on low flame to avoid bitterness.
  • Use fresh and good-quality spices for maximum aroma.
  • Store masala in small batches for freshness.
  • For extra flavor, add dry coconut powder while roasting the spices.

Health Benefits of Dabeli Masala Recipe

While Dabeli is often considered a street snack, its masala is rich in antioxidants and digestion-boosting spices like cumin, coriander, and fennel seeds. Moderate consumption can enhance metabolism and improve digestion.

Serving Suggestions

  • Pair Dabeli with masala chai for a classic Gujarati snack experience.
  • Serve as a party appetizer or evening snack.
  • Add extra roasted peanuts for crunch.

FAQs – Dabeli Masala Recipe

1. What is the difference between Kacchi Dabeli and regular Dabeli?
Kacchi Dabeli refers to the original style from Kutch, Gujarat, made with authentic Dabeli Masala and traditional chutneys.

2. Can I store homemade Dabeli Masala Recipe for long?
Yes, store it in an airtight container for up to 3 weeks for best flavor.

3. Which chilies are best for Dabeli Masala Recipe?
Byadgi chilies give color, while Kashmiri chilies provide mild heat.

4. Can I make Dabeli Masala Recipe without oil?
Yes, but roasting with a little oil enhances aroma and flavor.

5. Is Dabeli Masala Recipe spicy?
It is moderately spicy with a balance of sweet and tangy notes.

6. Can I buy ready-made Dabeli Masala Recipe?
Yes, but homemade masala is fresher and more flavorful.

7. What can I use Dabeli Masala Recipe for besides Dabeli?
It can be used in potato sandwiches, chaat, or as a spice mix for roasted snacks.

8. Is Dabeli healthy?
It’s moderately healthy when consumed occasionally, as it’s high in carbs and spices.

9. Can I freeze the Dabeli Masala Recipe filling?
Yes, store in a freezer-safe container for up to a month.

10. How do I make Dabeli Masala Recipe less spicy?
Reduce the number of red chilies and increase the amount of sweet chutney in the filling.

Leave a Comment

Kathiyawadi Dhokli Nu Shaak Recipe – A Traditional Gujarati Delight 2025

Kathiyawadi Dhokli Nu Shaak

Gujarati cuisine is known for its wholesome, flavorful, and rustic preparations, and one such hidden gem is the Kathiyawadi Dhokli Nu Shaak. This traditional curry, made with spiced wheat flour dumplings simmered in a tangy, spicy gravy, is a soul-satisfying dish from the Kathiyawadi region of Gujarat.

In this detailed blog, we will explore the Kathiyawadi Dhokli Nu Shaak Gujarati recipe, the ingredients used, its cultural significance, cooking tips, and how to prepare it step-by-step. Whether you’re a food enthusiast or a culinary explorer, this recipe will take you straight to the heart of rural Gujarat.

What is Kathiyawadi Dhokli Nu Shaak?

Kathiyawadi Dhokli Nu Shaak is a one-pot curry made with wheat flour dumplings (dhokli) that are cooked in a spicy, tangy, and slightly sweet gravy. The flavors are bold, earthy, and warming – just like the people of Saurashtra.

It is a staple in rural Gujarati homes, especially when vegetables are scarce or during monsoons. Pair it with bajara rotla or kathiyawadi vaghareli khichdi recipe, and you’ve got a complete hearty meal.

Kathiyawadi Dhokli Nu Shaak Recipe

Kathiyawadi Dhokli Nu Shaak Ingredients

To cook this authentic dish, you need easily available pantry items. Here’s what you need:

🔸 For the Dhokli (dumplings):

  • 1 cup whole wheat flour (gehun ka atta)
  • 1 tbsp gram flour (besan)
  • 1 tsp red chili powder
  • ½ tsp turmeric powder
  • ½ tsp carom seeds (ajwain)
  • 1 tsp oil
  • Salt to taste
  • Water (for kneading)

🔸 For the Curry:

  • 2 tbsp groundnut oil or any cooking oil
  • 1 tsp mustard seeds
  • 1 tsp cumin seeds
  • A pinch of asafoetida (hing)
  • 1 tbsp ginger-green chili paste
  • 1 chopped tomato
  • 1½ tbsp jaggery (gud)
  • 1 tbsp tamarind pulp (imli)
  • 1 tsp red chili powder
  • ½ tsp turmeric powder
  • Salt to taste
  • 3 cups water
  • Chopped coriander for garnish

Step-by-Step Recipe for Kathiyawadi Dhokli Nu Shaak in English

1. Prepare the Dhokli Dough

Mix and Knead

In a large bowl, combine whole wheat flour, besan, red chili powder, turmeric, ajwain, salt, and oil. Add water gradually and knead into a firm yet pliable dough.

Pro Tip: Let the dough rest for 10-15 minutes to soften.

2. Shape the Dhokli

Flatten and Cut

Take small portions of the dough and roll it out thin like roti. Cut into diamond or square shapes using a knife or pizza cutter.

Traditional Tip
In rural Kathiyawad, women roll and cut these in bulk and store them semi-dry for future use.

3. Prepare the Curry Base

Tempering the Spices

Heat oil in a thick-bottomed kadai. Add mustard seeds, cumin seeds, hing, and let them crackle. Then add ginger-chili paste and sauté for a minute.

Add the Tang and Sweetness

Add chopped tomatoes, red chili powder, turmeric, jaggery, tamarind pulp, and salt. Cook until the tomatoes turn soft and the oil starts to separate.

Add Water

Pour about 3 cups of water and let the mixture come to a rolling boil.

4. Add Dhoklis to the Curry

Drop Carefully

Gently add the cut dhoklis one by one into the boiling curry. Stir occasionally to avoid sticking.

Cook Covered

Cover and cook for 10-15 minutes on medium flame until the dhoklis become soft and fully cooked. They should swell and float to the top.

5. Garnish and Serve

Turn off the flame, add chopped coriander, and a drizzle of groundnut oil if you like it richer.

How to Serve Kathiyawadi Dhokli Nu Shaak

  • Serve hot with bajara rotla, bhakri, or even plain rice.
  • Pair it with buttermilk or chaas for an authentic Kathiyawadi experience.
  • For a full Kathiyawadi meal, add Kathiyawadi Vaghareli Khichdi and Lasaniya Bataka on the side.

Why You’ll Love This Dish

✅ No fancy ingredients – just rustic, real food.

✅ Vegan & nutritious.

✅ Perfect for winters or rainy evenings.

✅ Comes together quickly and easily.

Tips for Perfect Dhokli Nu Shaak

  • Always add dhoklis to boiling curry – never cold or lukewarm.
  • Use groundnut oil for authentic flavor.
  • Don’t skip jaggery – it balances the heat and tanginess.
  • Make the dhokli dough firm but not dry.

Nutritional Value (Per Serving Estimate)

ComponentQuantity
Calories~240 kcal
Protein6g
Fiber4g
Carbs35g
Fats8g

This is a wholesome dish filled with complex carbs, iron, and fiber.

Origin and Cultural Significance

Dhokli Nu Shaak comes from Saurashtra’s farming community, where innovation with minimal ingredients was a necessity. It represents how Gujarati cuisine transforms basics into bold, flavorful dishes. Similar dishes exist across Gujarat, Maharashtra, and Rajasthan, but Kathiyawadi Dhokli stands out with its rich tadka and spicy tamarind gravy.

FAQs – Kathiyawadi Dhokli Nu Shaak Recipe

1. What is Kathiyawadi Dhokli Nu Shaak?

It’s a traditional Gujarati curry made with wheat flour dumplings cooked in a spicy, tangy tomato-based gravy.

2. How is Kathiyawadi Dhokli Nu Shaak different from Dal Dhokli?

Dal Dhokli uses lentils as a base, while Kathiyawadi Dhokli Nu Shaak uses a spiced tomato-tamarind gravy with no lentils.

3. Can I make this recipe gluten-free?

Yes, you can try using jowar or bajra flour instead of wheat flour, but the texture will vary.

4. How long does Dhokli Nu Shaak stay fresh?

It stays good for up to 2 days in the refrigerator. Reheat with a little water before serving.

5. Is it a vegan-friendly recipe?

Absolutely! There are no dairy products used in this dish.

6. Can I add vegetables to this dish?

Yes, vegetables like bottle gourd (lauki) or brinjal can be added for more nutrition.

7. Is Kathiyawadi Dhokli Nu Shaak spicy?

It’s moderately spicy, but you can adjust the chili quantity based on your preference.

8. Can I make the dhokli in advance?

Yes, you can roll and cut the dhokli and store them in the fridge for a few hours.

9. What is the best accompaniment to Dhokli Nu Shaak?

It goes best with Kathiyawadi Vaghareli Khichdi, bajra rotla, or even steamed rice.

10. Where can I find more authentic Gujarati food recipes online?

You can find them on gujaratifoodrecipes.in – your go-to destination for the best Gujarati recipe online.

Conclusion

The Kathiyawadi Dhokli Nu Shaak Gujarati recipe is more than a dish—it’s a warm hug from a rustic kitchen in Gujarat. With its spicy, tangy, and earthy flavors, it’s perfect for days when you want something simple yet satisfying.

Bookmark this page, try it in your kitchen, and enjoy the rich flavors of Kathiyawad right at home. Don’t forget to check out more traditional recipes and let your kitchen tell a story of India’s culinary legacy.

Leave a Comment

Farali Pav Bhaji Recipe 2025

Farali Pav Bhaji Recipe

Farali Pav Bhaji Recipe is a delicious, vegetarian street food classic reimagined for fasting (vrat/upvas) days. Unlike the regular version, Farali Pav Bhaji is free of onions, garlic, and grains, and is made with vrat-friendly ingredients that comply with religious fasting traditions.

Yet, it packs a punch of flavors, making it a favorite not just during festivities but whenever you crave something tangy, spicy, and wholesome. In this comprehensive article, we’ll delve into the Farali Pav Bhaji Recipe ingredients, step-by-step preparation, unique tips, and frequently asked questions to help you master this iconic Gujarati food recipe at home.

What Is Farali Pav Bhaji Recipe?

Farali Pav Bhaji Recipe is a unique twist on the iconic Mumbai pav bhaji, tailored for days of fasting (Ekadashi, Navratri, Maha Shivratri, Janmashtami, etc.) in India. The word “farali” means food permissible for Hindu fasts, while “pav bhaji” refers to the beloved mashed vegetable curry served with soft bread rolls.

This version replaces regular pav bread with vrat (fasting) breadsuch as rajgira (amaranth), sama (barnyard millet), or singhara (water chestnut) flour-based bread—and swaps some ingredients to align with fasting rules.

Why Is Farali Pav Bhaji Recipe So Popular?

  • Fast-friendly: 100% compatible with Hindu fasting guidelines.
  • Delicious and hearty: Despite restrictions, it delivers deep flavors and satisfaction.
  • Nutritious: Uses a variety of vegetables, making it wholesome and filling.
  • Versatile: Perfect for lunch, dinner, or even as a party snack.
  • Quick to make: Ready in under 45 minutes.
Farali Pav Bhaji Recipe

Farali Pav Bhaji Recipe Ingredients

Getting the base ingredients right is key to an authentic fasting bhaji. Here’s what you’ll need:

Vegetables

  • 2 large potatoes (preferably boiled and peeled)
  • 1 cup tomatoes, finely chopped
  • 1 cup bottle gourd (lauki), diced
  • 1 cup sweet potato, diced
  • ½ cup capsicum, diced
  • 1 cup cauliflower florets (optional, if permitted in your fasting tradition)
  • ¼ cup carrots or raw banana, diced (optional)

Fasting Ingredients

  • 2 tbsp ghee (clarified butter) or oil allowed in fasting
  • 2-3 green chilies, chopped
  • 1 inch ginger, grated
  • Sendha namak (rock salt), as per taste
  • ¾ tsp cumin seeds
  • ½ tsp black pepper powder
  • 2 tsp cumin-coriander powder (made from roasted cumin and coriander seeds)
  • 1-2 tsp lemon juice
  • Coriander leaves (fresh), chopped – to garnish

For Pav (Bread)

  • 6 Rajgira (amaranth flour) or Singhara (water chestnut flour) pav or bread—store-bought or homemade
  • 2 tbsp butter (optional, for roasting pav)

Optional for Garnish

  • Grated paneer (cottage cheese)
  • Chopped coconut
  • Extra butter

Farali Pav Bhaji Recipe : Step-by-Step Instructions

Step 1 – Prepping the Vegetables

  • Wash, peel, and chop all vegetables as needed for quick cooking.
  • Boil potatoes, sweet potatoes, and bottle gourd together until soft. Mash them lightly.
  • Reserve a portion of boiled vegetables for later texture variation.

Step 2 – Sautéing

  • Heat ghee in a pan. Add cumin seeds; let them splutter.
  • Add chopped ginger and green chilies. Sauté for a minute.
  • Add capsicum and sauté for 2-3 minutes until slightly soft.
  • Add tomatoes and cook until they turn mushy and release oil.

Step 3 – Cooking the Bhaji

  • Add the boiled and mashed root vegetables (potato, sweet potato, bottle gourd).
  • Stir in diced raw banana, carrots, and cauliflower if using.
  • Sprinkle sendha namak, black pepper powder, and cumin-coriander powder.
  • Mix thoroughly and mash with a potato masher for that smooth, iconic bhaji texture.
  • Add a little water if the mixture is too thick.
  • Cover and cook on medium heat for 8-10 minutes, stirring regularly.

Step 4 – Finishing Touches

  • Add lemon juice, chopped coriander, and more ghee or butter to enrich flavor.
  • Adjust seasoning as needed to taste.

Step 5 – Preparing Farali Pav

  • Heat a tawa or flat pan. Add a dollop of butter (if using).
  • Slice the vrat pav or bread horizontally. Toast until golden and slightly crisp.

Step 6 – Serving

  • Serve hot bhaji topped with extra butter and grated paneer, alongside toasted pav.
  • Garnish with coriander and lemon wedges.

Tips for the Best Farali Pav Bhaji Recipe

Authentic Flavor & Texture

  • Always use sendha namak: Table salt is not allowed during fasts.
  • Rajgira or singhara pav: Choose gluten-free, vrat-friendly bread for authenticity.
  • Richness: Don’t skip the ghee or butter for that signature flavor.
  • Customize heat: Adjust green chilies and black pepper as per your taste.
  • Use fresh ingredients: Vegetables, green chilies, and ginger should be fresh to maximize taste.

Storage & Reheating

  • Refrigerate leftover bhaji in airtight containers for up to 2 days.
  • Reheat with a splash of water to restore consistency.

Farali Pav Bhaji Recipe – Nutritional Value

Farali Pav Bhaji scores high on nutrition, combining starchy vegetables (potato, sweet potato, tapioca) with protein (paneer), and vitamins from bottle gourd, tomatoes, and capsicum. It’s a balanced meal, supplying energy during fasting, and can be made vegan by choosing oil over ghee or butter.

Farali Pav Bhaji Recipe in English : Why Choose This Fasting Recipe?

  • Universal Appeal: Explains ingredients and steps in English for everyone to try, regardless of location or background.
  • Perfect for Special Diets: Gluten-free and vegetarian by nature.
  • Cultural Connection: Preserves age-old Gujarati culinary traditions in a modern avatar.

FAQs : About Farali Pav Bhaji Recipe

1. What is the difference between regular pav bhaji and farali pav bhaji recipe?

Farali Pav Bhaji Recipe uses fasting-friendly ingredients like sendha namak, ghee, rajgira flour pav, and omits onions, garlic, and regular bread. Regular pav bhaji, meanwhile, contains mixed vegetables, butter, and is served with wheat-based pav.

2. Can I make Farali Pav Bhaji Recipe vegan?

Yes! Replace ghee and butter with peanut or sesame oil.

3. Is Farali Pav Bhaji Recipe gluten-free?

Absolutely, when served with rajgira or singhara flour pav.

4. Which vegetables can I use for Farali Pav Bhaji Recipe?

Typically, potatoes, sweet potatoes, tomatoes, bottle gourd, and capsicum are used. You can also add carrots, raw bananas, and cauliflower if permitted.

5. What is sendha namak and why is it used?

Sendha namak (rock salt) is natural, unprocessed salt allowed in fasting, replacing regular table salt.

6. What type of pav is used for Farali Pav Bhaji Recipe?

Rajgira (amaranth flour), singhara (water chestnut flour), or sama ke chawal (barnyard millet flour) pav is used.

7. Can I prepare Farali Pav Bhaji Recipe without special pav?

Yes! Serve with vrat-friendly rotis or dosas made with sama rice or rajgira flour.

8. How to store leftover Farali Pav Bhaji Recipe?

Store in an airtight container in the refrigerator for up to 2 days. Reheat before serving.

9. Is this recipe suitable for Navratri fasting?

Yes, it’s specially tailored for Navratri and other Hindu fasting festivals.

10. Is Farali Pav Bhaji Recipe healthy?

Yes, it’s packed with nutrients, moderate calories, and can be tailored for vegan, gluten-free, or low-fat diets.

Pro Tips for Ranking Your Farali Pav Bhaji Recipe

To optimize your Farali Pav Bhaji post for Google Page 1:

  • Integrate the following keywords naturally: farali pav bhaji, farali pav bhaji recipe ingredients, farali pav bhaji gujarati recipe, farali pav bhaji gujarati food recipe, farali pav bhaji in english.
  • Use structured headings (H1, H2, H3, H4) for better readability and SEO.
  • Add unique, instructive tips to make your content stand out.
  • Answer user queries with a detailed FAQ section.

Conclusion:

Farali Pav Bhaji is a testament to the ingenuity of Gujarati cuisine, proving that fasting meals can be exciting and full of flavor. Whether you’re observing a fast, have dietary restrictions, or simply want to try a lighter twist on Mumbai’s beloved street food, this farali pav bhaji recipe will surely satisfy. Embrace these authentic flavors, and bring joy to your vrat menu today!

Leave a Comment

Delicious Chikoo Milkshake Gujarati Recipe|Gujarati Food Recipes Online 2025

Chikoo Milkshake Gujarati Recipe

Chikoo Milkshake Gujarati Recipe, or Sapota Milkshake, is a beloved summertime drink across many Indian households. In Gujarat, this refreshing treat holds a special place as a quick, energy-boosting beverage that blends the creamy texture of chikoo with the wholesome richness of milk. Whether served during breakfast, post-lunch, or as a nutritious snack for children, this Gujarati Recipe is a delightful addition to your Gujarati Food Recipes Online collection.

If you’re searching for the Best Gujarati Recipe Online that’s both simple and satisfying, this Chikoo Milkshake Gujarati Recipe fits perfectly.

Chikoo Milkshake Gujarati Recipe

What is Chikoo Milkshake?

Chikoo milkshake is a creamy and flavorful beverage made with ripe chikoos, also known as sapodillas or sapotas. Chikoos are tropical fruits that have a sweet and caramel-like flavor, making them an excellent ingredient for milkshakes.

To make a chikoo milkshake, ripe chikoos are peeled and deseeded, and then blended with chilled milk. Sugar and a touch of vanilla extract can be added to enhance the sweetness and flavor of the milkshake. Ice cubes can also be added to make it more refreshing and chilled.

The result is a smooth and creamy milkshake with a rich chikoo flavor. Chikoo milkshake is enjoyed as a refreshing drink, especially during hot summer months. It is a popular choice for people who enjoy tropical fruit flavors and creamy beverages.

Chikoo milkshake can be customized according to personal preferences. Some people may prefer a thicker consistency, while others may prefer a thinner one. The sweetness level can also be adjusted by adding more or less sugar. Overall, chikoo milkshake is a delightful and indulgent treat that showcases the unique flavor of chikoos and provides a refreshing beverage option.

Chikoo (also known as sapota or sapodilla) is a naturally sweet tropical fruit loaded with fiber, antioxidants, and vitamins. When blended with chilled milk and a touch of cardamom, it transforms into a creamy, indulgent drink that is not only tasty but also highly nutritious.

Ingredients – Traditional Gujarati Style

To make a thick and flavorful Chikoo Milkshake in true Gujarati Recipe style, gather the following ingredients:

  • 4–5 ripe chikoos (sapota), peeled and deseeded
  • 2 cups full-fat chilled milk (boiled and cooled)
  • 1–2 tablespoons sugar or jaggery (optional, depending on sweetness)
  • ¼ teaspoon cardamom powder (elchi)
  • 3–4 ice cubes (optional)
  • Chopped dry fruits (cashew, almonds) for garnish
  • A few strands of saffron (optional, for aroma)

Step-by-Step Preparation – Chikoo Milkshake Recipe

Step 1: Prepare the Fruit

Peel the chikoos, remove the seeds, and chop them into small pieces. Ensure the fruit is fully ripe for the best flavor and texture.

Step 2: Blend the Ingredients

In a blender jar, add the chopped chikoo, chilled milk, sugar (or jaggery), and cardamom powder. Blend until you get a smooth, creamy consistency. If you prefer it colder, add ice cubes before blending.

Step 3: Adjust the Sweetness

Taste the milkshake. If the natural sweetness of chikoo isn’t enough, you can add more sugar or jaggery according to your preference.

Step 4: Serve Fresh

Pour the milkshake into tall glasses. Garnish with chopped dry fruits or saffron for a royal touch. Serve immediately

Tips to Perfect Your Gujarati Chikoo Milkshake

  • Use fully ripe chikoo to avoid a chalky taste.
  • You can replace sugar with organic jaggery or honey for a healthier version.
  • For a richer taste, add a scoop of vanilla or chikoo ice cream.
  • To make it vegan, use almond milk or oat milk as an alternative.

Health Benefits of Chikoo Milkshake

  • High in energy – perfect for children and active adults.
  • Rich in dietary fiber – promotes healthy digestion.
  • Excellent source of Vitamin A and C – boosts immunity and skin health.
  • Ideal as a natural weight-gainer for underweight individuals.

Why This is the Best Gujarati Recipe Online

Among all Gujarati Food Recipes, this one stands out because of its simplicity, cultural relevance, and health benefits. It embodies the essence of home-style Gujarati Recipe cooking – minimal ingredients, maximum flavor.

Whether you’re exploring Gujarati Food Recipes Online or teaching your kids the importance of traditional food, the Chikoo Milkshake Gujarati Recipe is an ideal addition to your kitchen.

Conclusion

Chikoo milkshake is a delectable and creamy beverage that highlights the delicious flavor of ripe chikoos. With its sweet and caramel-like taste, chikoo milkshake is a popular choice for those seeking a refreshing and tropical drink.

Whether enjoyed during hot summer months or as a special treat, chikoo milkshake offers a delightful combination of creamy texture and rich chikoo flavor. By blending ripe chikoos with chilled milk, sugar, and optional vanilla extract, you can create a smooth and satisfying milkshake.

Whether you prefer it thick or thin, sweetened to taste, or garnished with cinnamon or chikoo slices, chikoo milkshake is a versatile and customizable beverage. So, next time you have some ripe chikoos on hand, consider making a chikoo milkshake to indulge in its luscious taste and enjoy a tropical treat.

If you’re on the hunt for the Best Gujarati Recipe Online, don’t overlook this humble but delightful Chikoo Milkshake. Easy to prepare, packed with nutrients, and rich in regional flavor, it’s a must-try for every Gujarati food lover.

FAQs – Chikoo Milkshake Gujarati Recipe

1. What is the traditional way to make Chikoo Milkshake in a Gujarati recipe?

The traditional Gujarati Recipe for Chikoo Milkshake involves blending ripe chikoo with chilled full-fat milk, a pinch of cardamom, and optional sugar or jaggery. Garnishing with dry fruits is a common touch in many Gujarati food recipes.

2. Can I use jaggery instead of sugar in this Chikoo Milkshake Gujarati recipe?

Yes, jaggery is a healthier, natural sweetener often used in Gujarati Food Recipes Online. It adds a rich flavor and makes the milkshake more nutritious.

3. Is Chikoo Milkshake considered a healthy drink in Gujarati cuisine?

Absolutely! Chikoo Milkshake is rich in vitamins, fiber, and natural sugars, making it a wholesome drink often recommended in Gujarati food recipes for kids and adults alike.

4. Can I make this recipe vegan-friendly?

Yes, simply substitute dairy milk with almond or oat milk. This variation is now trending even in modern versions of Gujarati food recipes online.

5. What makes this the Best Gujarati Recipe Online for summer?

It’s quick, cooling, energizing, and made with minimal ingredients – all of which make it one of the Best Gujarati Recipes Online for summer refreshment.

6. How long can I store Chikoo Milkshake?

It’s best consumed fresh, but you can refrigerate it for up to 24 hours. Always store it in a sealed container for best quality.

7. Do I need to add cardamom or saffron to Chikoo Milkshake?

While optional, cardamom and saffron add a royal Gujarati touch to the milkshake, as seen in many festive Gujarati food recipes.

8. Can I include this Chikoo Milkshake in my Gujarati breakfast routine?

Definitely. It pairs well with light Gujarati snacks like thepla or khakhra, making it a nourishing addition to any traditional Gujarati breakfast recipe.

9. Is this Chikoo Milkshake recipe suitable for kids?

Yes, it’s one of the most kid-friendly Gujarati food recipes online. It’s naturally sweet, nutrient-rich, and perfect for school tiffins or post-play energy boosts.

10. Where can I find more authentic Gujarati food recipes online?

You can explore more on our website under the Gujarati Food Recipes section, where we bring you handpicked, easy-to-make dishes that celebrate the true flavors of Gujarat.

Leave a Comment